Kit 7 Synchron 35142 (120V) Replacement Kit Preliminary Instructions Rev 1
Reduced size version where unable to fit standard Belimo Kit 7
Copyright 2020 Retrozone Inc Parker Tx email: Support@retrozone.inc
Purpose: Use this kit in 120 volts to replace obsolete Durozone 35142 motors where standard Belimo kit 7 will not fit. (This unit measures approx. 2 1/2” x 3”x 4”.)
Warning: When wiring this kit for 120 volts, observe all codes, use green grounding wire, and supply any junction boxes needed to insure a safe installation.
This kit replaces motors on Durozone, EWC and other brand dampers using a slotted 7/32 damper drive shaft.
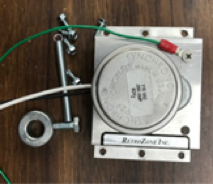
Picture 1: shows the new motor and support bracket and 1/2 ID collar and spring, and mounting hardware. Not shown is a lock washed used as a spacer.
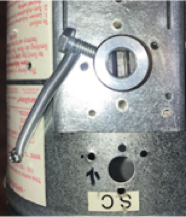
Picture 2: Shows the collar mounted on the 1/2 inch slotted damper drive shaft-Do not over tighten or you can bend the slotted drive shaft.
Note the orientation of the collar, slot, and spring, and install to match. Note the screw that holds the green grounding wire on motor also serves as the blade/motor stop. Spring: anchor spring approx. 1/4 inch beyond its normal length as shown. See spring notes below.
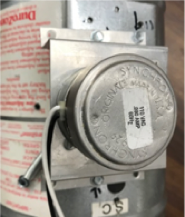
Picture 3: Motor installed onto damper. Gently and slowly turn motor drive shaft to align with slotted damper drive shaft and install motor as shown. Take care to center motor pin in slotted drive shaft as carefully as possible. If off center, motor may bind. Use provided lock washed or washer under side of bracket not on flat portion of damper to help level the assembly.
Installation notes:
*Spring installation notes: You may need to adjust spring orientation and length to fit your application. If you do tension the spring too much, the damper may not fully open. Too loose, and damper may not fully open. Start by stretching and mounting spring 1/4 inch beyond its normal length.
*It’s important to center the motor drive pin in the slotted damper drive part. As needed, you can drill the mounting holes in the bracket to larger sizes, to allow you to move the motor around to re-center as needed, before tightening.


