Notes on Converting a 2 wire zone control board to operate a Belimo LMB 3wire damper
Warning: Consult and use only a qualified electrician and verify that only 24vac low voltage is being tested. Do not proceed if any doubt exists on the following instructions since damage to system parts, especially transformer, and loss of HVAC operation can result. Always disconnect power before performing any wiring changes.
Call RetroZone™ during normal business hours for technical assistance. RetroZone™ can provide at nominal cost and R4 interposing relay assembly that eliminates the need for the following instructions, and allows 3 wire damper operation from a two wire damper output.
Method 1. If your previous 2 wire motor was connected to a board that only has two damper outputs: the LMB 24 Motor can be used by connecting 24vac common to motor terminal 1, 24vac + to terminal 2 (this is not one of the two existing damper outputs on the board) and then the “switched” leg of 24vac (is one of the two damper outputs on board ) to terminal 3. A voltage meter may be needed to accomplish this, since the terminals may not be marked. Essentially, terminal 1 to motor must be the 24vac common, while both terminals 2 and 3 must be the other, and same, “leg’ of the transformer. Before hooking up the three wires to the damper motor, check to see that 24vac exists full time between wire 1 and 2, and is switched (as damper is commanded open and closed by zone controller) between 1 and 3. If you fail to get a clean reading from 24 to 28 volts ac, between 1 and 2 full time AND and 1 and 3 (when damper should close), the legs are likely mis-identified and you should not hook up damper motor.
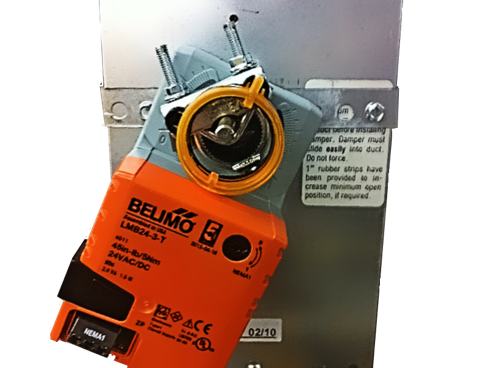
Note 1. : Command the damper to “close” by turning that zone’s thermostat “off” while at the same time making another thermostat call for air, you should then clearly read 24-28 volts on the two damper outputs. How this works electrically: The Belimo LMB motor is unique in that it can wired in this manner: Full time 24 vac to terminals 1 and 2, with terminal 3 being used as “signal” voltage: when power is placed on 3, the damper closes, when power is removed from 3, the damper opens (and you can reverse this action by moving the round 0 and 1 switch on the face of the motor). Alternate Method for connecting Belimo LMB 3 wire power open/power close motor to a zone control panel with only two damper outputs (set up to only use 2 wire spring return dampers):
Note 2 : On zone control boards with just two damper output terminals, one of the damper output terminals is 24VAC COMMON, the other terminal is the 24VAC + “SWITCHED” leg of the transformer. The goal is to identify the two terminals, as well as the full time “hot” + wire, to enable proper operation of the 3 wire Belimo LMB 24 volt motor.
1. Find the the 24vac low voltage terminals where the main 24vac transformer connects to the zone control board. You should read a continuous 24-28 volts vac on these two main power supply terminals.
2. Turn all thermostats to the “off position. This should cause all dampers to open. Little or no voltage should be present, when using a meter, between the two damper output terminals. Verify this is correct.
3. With one meter probe on one of the main power supply terminals, test the two transformer input connections and the two damper outputs for 24-28volts AC. You should find 24-28 volts only on one pair of the transformer and damper output terminals. When you find 24vac, carefully note which two terminals:3a. On the transformers inputs, this will likely be the 24vac + Hot leg of transformer, and this will go to terminal 2 on the Belimo LMB motor3b. On the damper output terminals, the other terminal (where you found 24vac with your meter) will likely be the 24vac “common” leg of transformer, and this will go to terminal 1 on the Belimo LMB motor. 3c. The opposite damper output terminal should be the 24 vac + “hot” switched leg of transformer, this will go to terminal 3 on Belimo LMB damper motor.
4. With 24vac power disconnected, connect these three wires to zone control board, and carefully label wires 1,2, and 3 as shown above, but DO NOT connect to damper motor until wiring is verified.
5. With voltage meter, test three wires as follows:
a. terminals 1 and 2 should show 24/28 volts all the time.
b. terminals 1 and 3 should show little or no voltage(assuming thermostats are still turned to off position).
c. terminals 2 and 3 should show little or no voltage.
6. Now Turn on a thermostat on any other zone, in order to cause the damper/zone you are working on to provide power to close the damper (which is still not connected).
Now: a. terminals 1 and 2 should still show 24/28 volts all the time.
b. terminals 1 and 3 should show 24/28 volts.
c. terminals 2 and 3 should show little or no voltage (since you should be reading same + leg of transformer.
d. STOP if the above readings are not clear to you, and consult RetroZone. If wiring checks out as described, carefully wire new Belimo LMB motor and test.